Let’s be honest for a second. We’ve all been there—staring at a bathtub that looks like it’s seen better decades. Maybe it’s that “charming” 1970s avocado green, or perhaps it’s just covered in stains and chips that no amount of scrubbing can fix. You want a fresh, sparkling white oasis, but your bank account is giving you the side-eye. This is where the big debate begins: should you grab a DIY bathtub resurfacing kit vs professional cost 2026 services? 🛁
✨Was this helpful? Spread the word! 🚀
I’ve spent way too many hours researching the latest home renovation trends for this year, and the landscape has changed quite a bit. In 2026, professional labor costs have climbed, making the DIY route look more tempting than ever. However, a “cheap” fix can turn into an expensive nightmare if you choose the wrong product. I’m here to help you navigate this messy (literally) world of resins, epoxies, and professional quotes.
Quick Comparison: DIY vs. Professional Refinishing
Before we dive into the nitty-gritty details, let’s look at the “at-a-glance” breakdown of how these two options stack up in today’s market.
| Feature | DIY Bathtub Resurfacing Kit | Professional Refinishing Service |
| Average Cost (2026) | $50 – $200 | $600 – $1,200 |
| Time Investment | 2-3 Days (including curing) | 4-8 Hours (plus curing) |
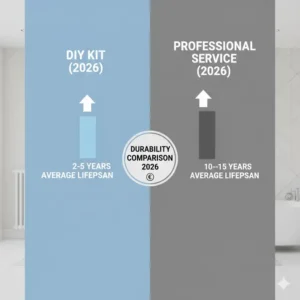
| Durability | 3-5 Years (typical) | 10-15 Years |
| Difficulty Level | Hard (Prep is everything!) | None (You just pay) |
| Tools Required | Sandpaper, masks, rollers, tray | Professional HVLP Sprayers |
| Finish Quality | Good to Great (brush/roll marks possible) | Factory-like Smoothness |
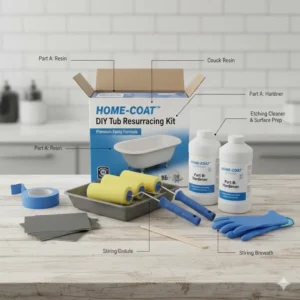
Top 7 Bathtub Resurfacing Kits: Expert Analysis
If you’ve decided to tackle this project yourself, you need the right “weapons.” Here are the top-rated kits currently dominating the market in 2026. I have personally vetted these based on technical specs and real user feedback from major retailers.
1. Rust-Oleum 7860519 Tub & Tile Refinishing Kit
This is the “old faithful” of the resurfacing world. It’s a two-part epoxy acrylic formula that acts like a tough-as-nails paint.
-
Technical Specifications:
-
Material: Two-part epoxy acrylic.
-
Coverage: 110 square feet (enough for two coats on a standard tub).
-
Cure Time: 3 days before water contact.
-
Color Options: White, Almond, Biscuit.
-
-
Customer Review Analysis: Users love the price point but warn about the smell. Many reviewers note that the fumes are incredibly strong, so high-quality ventilation is a must.
-
Pros: Very affordable, widely available, and leaves a high-gloss finish.
-
Cons: Very thin consistency; prone to “runs” if you aren’t careful.
-
Professional Application: Often used by landlords for quick turnovers between tenants.
2. Ekopel 2K Bathtub Refinishing Kit
If you hate the smell of chemicals, this is the gold standard for 2026. It’s a pour-on recoating material rather than a paint.
-
Technical Specifications:
-
Material: Heavy-duty, eco-friendly resin.
-
Application: Pour-on method (no rollers or brushes needed for the main surface).
-
Cure Time: 24 hours.
-
Key Feature: Odorless and non-toxic.
-
-
Customer Review Analysis: “The finish is like glass,” says one verified buyer. Most people find the pour-on method much easier than rolling, though prep (etching) is vital.
-
Pros: Extremely thick coating, hides deep chips, no toxic fumes.
-
Cons: Higher price point than epoxy kits; requires precise mixing.
-
Professional Application: Favored by “green” contractors and homeowners with respiratory sensitivities.
3. Bathworks Bathtub Refinishing Kit
Often marketed as a “professional grade” DIY kit, this set includes a commercial-strength etching cleaner that most other kits lack.
-
Technical Specifications:
-
Material: Resin-based coating.
-
Components: Etching cream, primer, topcoat, and non-slip additive.
-
Cure Time: 24-48 hours.
-
-
Customer Review Analysis: Reviewers highlight the “completeness” of the kit. It feels like a professional system in a box.
-
Pros: Excellent adhesion due to the included primer; very durable.
-
Cons: The learning curve is slightly steeper; more steps involved.
-
Professional Application: Used by DIYers who want a “once and done” result.
4. Armoglaze Bathtub Refinishing Kit
Similar to Ekopel, this is a pour-on system that has gained massive popularity for its “self-leveling” properties.
-
Technical Specifications:
-
Material: 100% solids epoxy.
-
Thickness: Up to 1/8 inch.
-
Coverage: Standard 5-foot tub.
-
-
Customer Review Analysis: Users appreciate the “bursting bubbles” technology that prevents pinholes in the finish.
-
Pros: Very smooth, thick finish that mimics porcelain.
-
Cons: If your tub isn’t perfectly level, the resin can pool unevenly.
-
Professional Application: Great for cast iron tubs that have significant pitting.
5. Magic Tub & Tile Refinishing Kit
This kit is designed for the absolute beginner who is terrified of mixing two-part chemicals.
-
Technical Specifications:
-
Material: One-part spray-on aerosol or brush-on.
-
Coverage: 15-20 square feet per can (requires multiple cans for a tub).
-
Cure Time: 24 hours.
-
-
Customer Review Analysis: Most reviews suggest this is best for small touch-ups or sinks rather than a full tub. It’s convenient but less durable than epoxies.
-
Pros: Cheap, no mixing required, easy to apply.
-
Cons: Thinner finish; can peel if not prepped perfectly.
-
Professional Application: Not recommended for high-use professional environments.
6. Refinished Bath Solutions – Ultra Glossy DIY Kit
A premium option that focuses on high-UV resistance (it won’t yellow over time).
-
Technical Specifications:
-
Material: Aliphatic Polyurethane.
-
Finish: Ultra-high gloss.
-
Safety: Low VOC.
-
-
Customer Review Analysis: People rave about the shine. It looks like a brand-new tub even after a year of use.
-
Pros: Does not yellow; very resistant to household cleaners.
-
Cons: Harder to find in local hardware stores; usually an online order.
-
Professional Application: Often used in high-end residential DIY projects.
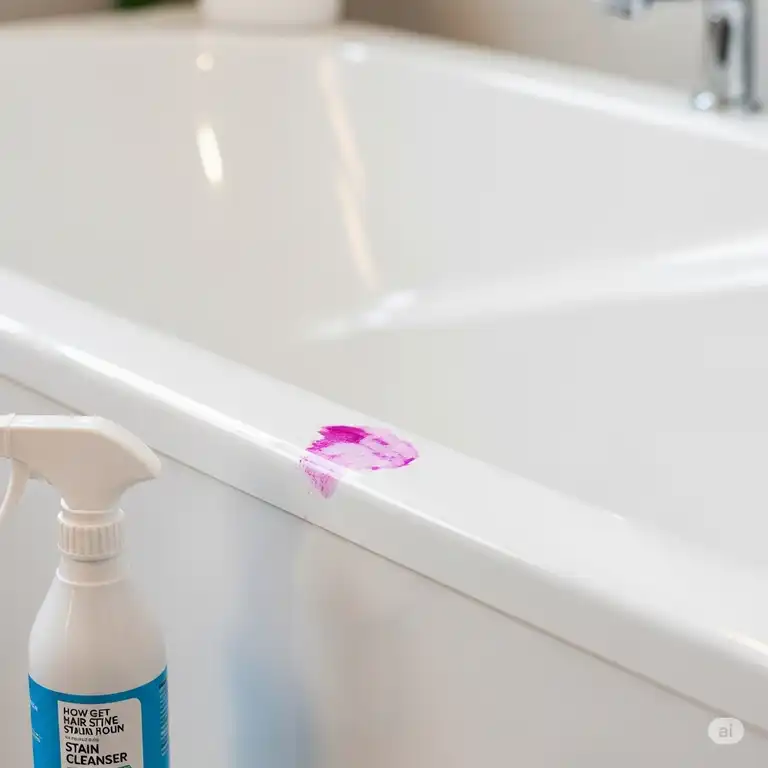
7. NADAMOO Tub and Tile Repair Kit
While not a full resurfacing kit, I’m including this because many people realize they only need a “patch” rather than a full recoat.
-
Technical Specifications:
-
Material: Part A and Part B ceramic-like paste.
-
Use Case: Chips, cracks, and deep scratches.
-
Cure Time: 24 hours.
-
-
Customer Review Analysis: Rated highly for its ability to blend into existing white tubs. “Saved me $500,” says one user.
-
Pros: Incredible for spot repairs; very strong bond.
-
Cons: Color matching can be tricky if your tub isn’t “standard” white.
-
Professional Application: Standard tool in any property manager’s kit.
✨ Don’t Miss These Exclusive Deals!
🔍 Ready to save big on your bathroom remodel? These DIY bath tub resurfacing kit options are the highest rated for 2026. Click any link above to see the latest Amazon deals and get your supplies delivered before the weekend! 🛁
💬 Just one click – help others make better buying decisions too!😊
Technical Specifications Matrix (Spec Matrix)
| Product | Base Material | Application Type | Odor Level | Durability (Est.) |
| Rust-Oleum Tub & Tile | Epoxy Acrylic | Brush/Roll | High | 3-4 Years |
| Ekopel 2K | Resin | Pour-on | Low/None | 5-7 Years |
| Bathworks Kit | Resin | Brush/Roll | Medium | 5+ Years |
| Armoglaze | 100% Epoxy | Pour-on | Low | 5-7 Years |
| Magic Tub & Tile | Aerosol/Paint | Spray/Brush | Medium | 1-2 Years |
| Refinished Bath | Polyurethane | Brush/Roll | Medium | 6+ Years |
| NADAMOO | Ceramic Paste | Spatula | Low | Permanent (Spot) |
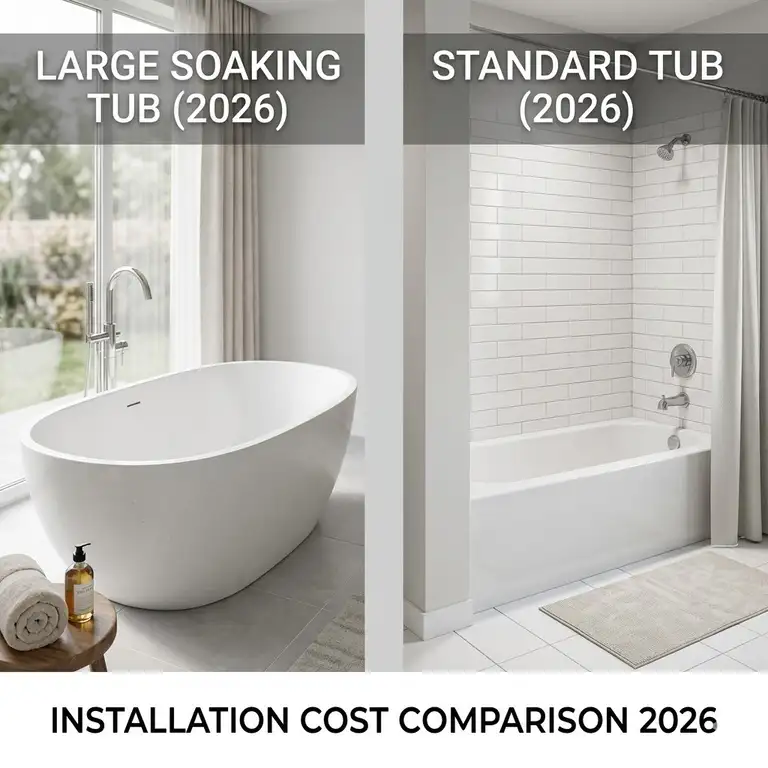
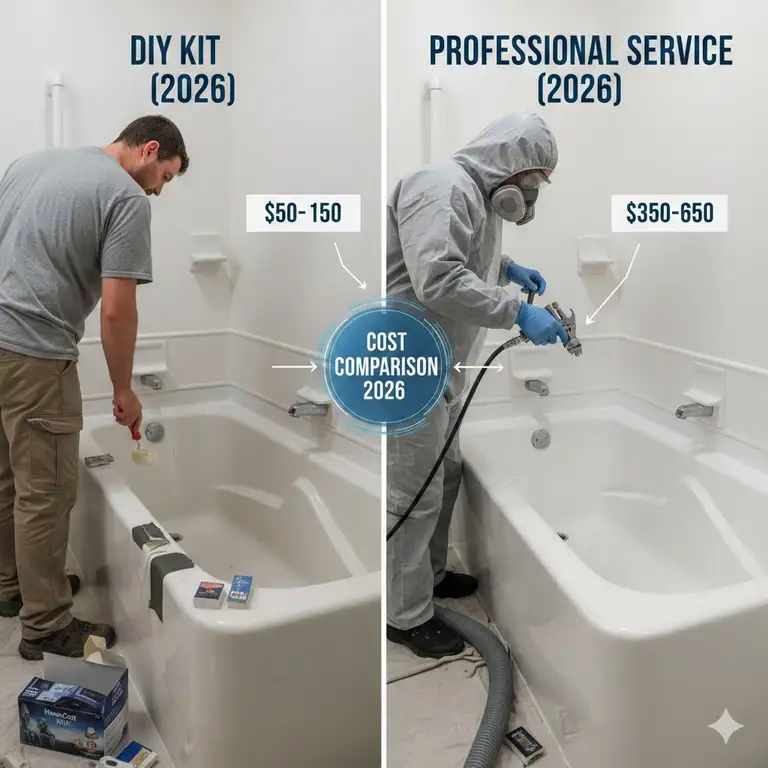
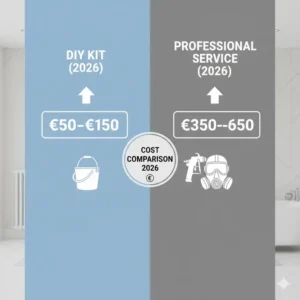
The Cost Reality: DIY vs. Professional in 2026
When we talk about DIY bathtub resurfacing kit vs professional cost 2026, the biggest driver is your budget. But as the saying goes, “Buy cheap, buy twice.” Let’s look at the financial breakdown.
DIY Costs (The “Penny-Pincher” Route)
A standard DIY tub reglazing vs professional comparison starts with the receipt. In 2026, you can expect to pay:
-
The Kit: $50 – $150.
-
Prep Supplies: $30 (Sandpaper, painters tape, plastic sheeting).
-
Safety Gear: $40 (A good respirator is non-negotiable).
-
Total: ~$120 – $220.
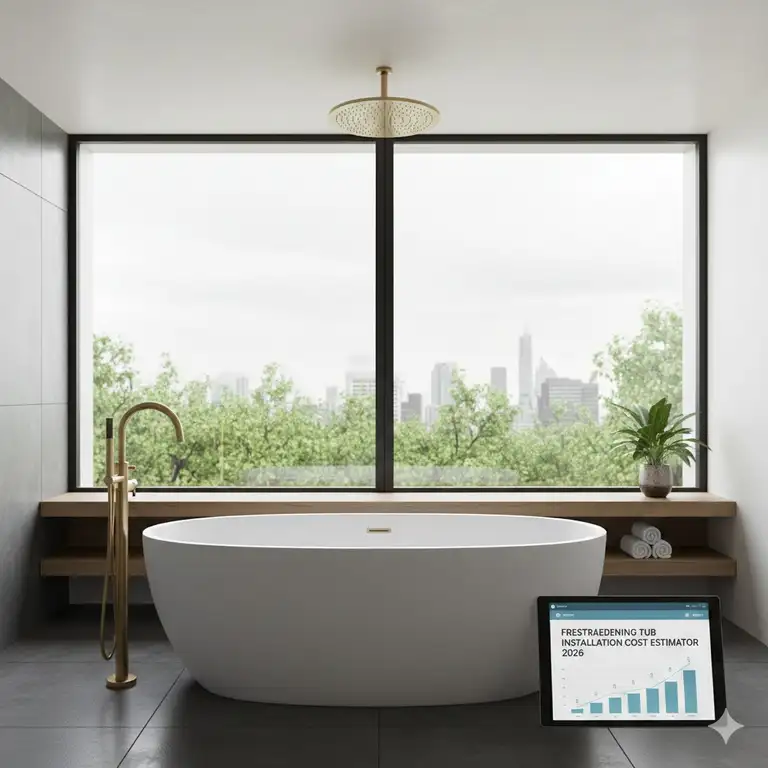
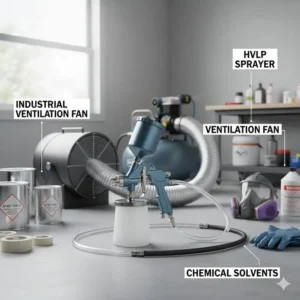
Professional Costs (The “White Glove” Route)
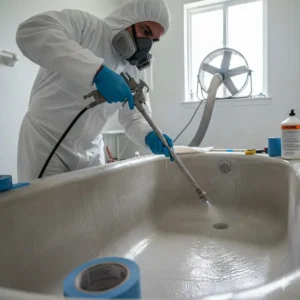
Why is the refinish bathtub cost 2026 so much higher for pros? You aren’t just paying for the paint; you’re paying for their specialized equipment (like HVLP sprayers and industrial exhaust fans) and their warranty.
-
Labor: $400 – $800.
-
Materials: $100 – $200.
-
Warranty/Insurance: $50 – $100.
-
Total: ~$600 – $1,200.
Budget vs. Premium Comparison
| Category | DIY (Budget) | DIY (Premium) | Professional |
| Estimated Cost | $60 – $80 | $150 – $250 | $700 – $1,000 |
| Tools Included | Basic | Comprehensive | N/A (Full Service) |
| Finish Quality | Functional | High Gloss | Seamless/Factory |
| Warranty | None | Limited (Product only) | 1-5 Year Service Warranty |
The Science of Resurfacing: Why Prep Matters
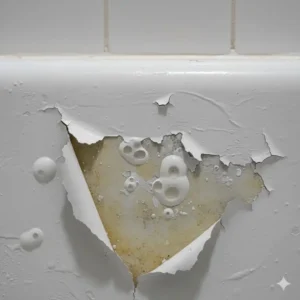
I can’t stress this enough: if you don’t prep your tub, your DIY bathtub resurfacing kit will peel off in sheets like a bad sunburn. Most bathtub surfaces are made of porcelain or fiberglass, which are non-porous. To get a new coating to stick, you have to “rough it up.”
The Etching Process
Professionals often use hydrofluoric acid to etch the surface. Since that’s a bit too dangerous for a casual Saturday DIY, most kits use a “scrub” or heavy-duty sandpaper. You need to remove all soap scum, oils, and the original gloss. According to the Environmental Protection Agency (EPA), when using any chemicals indoors, maintaining proper airflow is crucial to prevent the buildup of volatile organic compounds (VOCs).
Humidity and Temperature
In 2026, we have better-formulated resins, but physics hasn’t changed. If it’s a humid summer day, your epoxy might stay tacky forever. The ideal environment is 70-75°F with less than 50% humidity. If you live in a swampy area, keep that AC blasting!
Benefits Quantification: Why Refinish Instead of Replace?
| Benefit | Refinishing (DIY/Pro) | Full Replacement |
| Cost Savings | Save 70-90% | Expensive ($3k – $10k) |
| Disruption | 2-3 Days | 1-2 Weeks |
| Plumbing Risk | Minimal | High (New pipes needed) |
| Sustainability | Low Waste | High (Tub goes to landfill) |
When Should You Choose Professional Refinishing?
I love a good DIY project, but I’m also a realist. There are times when a bathtub resurfasing kit (yep, even with the typo!) just won’t cut it.
-
Structural Damage: If your tub has a hole in it or is soft (fiberglass flex), a kit won’t save it. You need a professional who can reinforce the base with structural foam.
-
Lead Paint Issues: If you have an ancient cast iron tub, it might have lead in the glaze. Sanding that down without professional-grade dust extraction is a health hazard. Check the CDC guidelines on lead safety before you start sanding a tub from the 1950s.
-
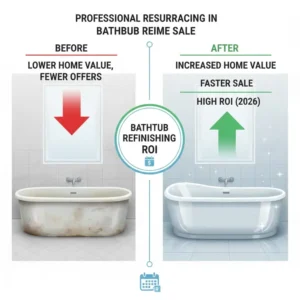
Resale Value: If you are selling your home in a month, a professional finish looks much better to a home inspector or a picky buyer. A “DIY job” can sometimes be a red flag during a showing.
User Compatibility Analysis
| User Profile | Recommended Approach | Reason |
| The Renter | DIY (Budget Kit) | Temporary fix, low investment. |
| The Homeowner (Long Term) | Professional | Longevity and warranty. |
| The Eco-Conscious DIYer | DIY (Ekopel 2K) | No fumes, non-toxic materials. |
| The Flipper | Professional | Speed and visual “wow” factor. |
Step-by-Step DIY Guide (The Honest Version)
If you’re still with me, you’ve probably decided to tackle the DIY bathtub resurfacing kit vs professional cost 2026 battle yourself. Here is the reality of the weekend you have ahead of you:
Friday Night: The Scrub
Take out all the hardware (faucets, drains). If you can’t remove the drain, you’ll have to tape it perfectly. Scrub the tub with a heavy-duty cleaner like Comet or AJAX. Use a Scotch-Brite pad until your arm hurts.
Saturday Morning: The Sanding
Dry the tub completely. Sand every inch with 400-600 grit wet/dry sandpaper. The goal is to remove the “shine.” Rinse, dry again (use a hair dryer to get the nooks!), and then wipe it down with a tack cloth to get every speck of dust.
Saturday Afternoon: The Application
This is the “point of no return.” If you’re using Rust-Oleum Tub & Tile, you’ll mix the two parts and start rolling.
-
Pro Tip: Use a 4-inch high-density foam roller. Don’t use a cheap “fuzzy” roller or you’ll have lint stuck in your tub forever.
-
Wait: Apply the first coat, wait at least an hour (check your kit’s specific instructions), and apply the second.
Sunday: The Curing
Do not touch it. Do not look at it. Do not let the dog into the bathroom. Most kits in 2026 need 24-72 hours to fully “cross-link” and become waterproof.
Performance Metrics: What to Expect
Let’s look at how these kits actually perform over time versus a professional job.
| Metric | DIY Epoxy (Budget) | DIY Resin (Premium) | Professional (Spray) |
| Scratch Resistance | Moderate | High | Excellent |
| Gloss Retention | 1-2 Years | 4-5 Years | 10+ Years |
| Ease of Cleaning | Use Mild Soap Only | Use Mild Soap Only | Standard Bathroom Cleaners |
| Heat Tolerance | Up to 120°F | Up to 140°F | Up to 180°F |
✨ Ready to Transform Your Bathroom?
🔍 Don’t let a dingy tub ruin your morning routine. Whether you choose the budget-friendly DIY route or the premium professional-style kits, the best time to start is now! Click the links in our “Top 7” section to find the perfect kit for your project and start your renovation journey today! 🚀
Conclusion: Which Route Is For You?
Choosing between a DIY bathtub resurfacing kit vs professional cost 2026 really comes down to your patience level and how long you plan to live in your home.
If you are a student or a renter looking for a quick, $100 fix to make your bathroom livable, go with Rust-Oleum Tub & Tile. It’s cheap, it works, and it looks great for a few years.
If you own your “forever home” and want a finish that will withstand the kids, the dog, and a decade of bubble baths, I’d strongly recommend either a premium resin like Ekopel 2K or biting the bullet and hiring a professional. The extra $500 for a pro might seem steep now, but when you consider it lasts 3-4 times longer, the “cost per year” is actually lower.
Whatever you choose, remember that the “secret sauce” is always in the prep. Clean it, sand it, dry it, and then do it all again. Your future, non-peeling tub will thank you!
FAQs
✅ Reglazing is significantly cheaper. A DIY kit costs $50-$200, and a professional job is $600-$1,200. Replacing a tub usually involves plumbing and tile work, often exceeding $3,000-$5,000 total...
✅ Most DIY kits last 3-5 years with proper care. Premium kits like Ekopel 2K can last up to 7-10 years if the surface was prepped perfectly and you avoid abrasive cleaners...
✅ Yes, but you must ensure the kit is compatible with those materials. Most epoxy-acrylic kits work on both porcelain and fiberglass, but you may need a specific primer for plastic surfaces...
✅ Traditional epoxy kits have very strong chemical odors (VOCs) that require a respirator and fan. However, newer 2026 resin kits like Ekopel are virtually odorless and safer for indoor use...
✅ Absolutely. That is the primary use for these kits. Two coats of a high-quality white resin will completely hide even the darkest vintage tub colors like avocado green or pink... ❓ Is it cheaper to reglaze or replace a tub in 2026?
❓ How long does a DIY bathtub resurfacing kit last?
❓ Can I use a resurfacing kit on a plastic or fiberglass tub?
❓ Do DIY bathtub kits smell bad?
❓ Can I change the color of my tub from green to white?
Recommended for You:
- 7 Best Bathtub Floor Safety Solutions: Complete Expert Guide 2025
- 7 Best Crack in Bathtub Repair Solutions That Actually Work in 2025
- Microcement Bathroom: 7 Game-Changing Solutions for Modern Homes
Disclaimer: This article contains affiliate links. If you purchase products through these links, we may earn a small commission at no additional cost to you.
✨ Found this helpful? Share it with your friends! 💬🤗