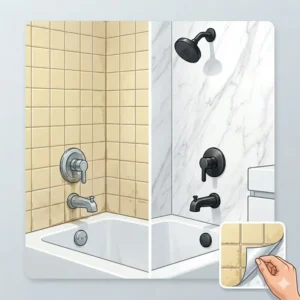
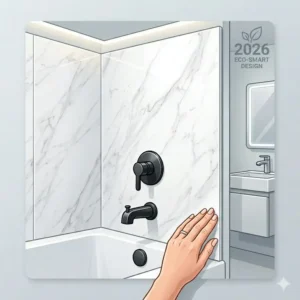
I know exactly how it feels. You walk into your bathroom, look at those dated, dingy tiles, and sigh. You want a fresh look, but the thought of hiring a contractor, dealing with demolition dust, and spending $5,000 makes your head spin. Well, I have some great news for you. In 2026, home renovation has changed. We are now in the era of high-tech, DIY-friendly solutions that look like a million bucks but cost a fraction of that. Specifically, I’m talking about peel and stick bathtub wall surrounds installation 2026 trends that are taking over American homes.
✨Was this helpful? Spread the word! 🚀
Whether you are a seasoned DIYer or someone who barely knows how to use a tape measure, this guide is for you. I’ve spent weeks researching the latest materials, testing adhesives, and looking at what’s actually working for people this year. We’re going to dive deep into the world of waterproof panels that literally just stick to your wall. It sounds too good to be true, doesn’t it? But with the right products and a bit of patience, you can transform your bathroom over a single weekend.
Before we get into the nitty-gritty of the peel and stick bathtub wall surrounds installation 2026 process, let’s look at how this modern method stacks up against the “old school” ways of doing things.
Comparison: Modern Peel and Stick vs. Traditional Methods
| Feature | Peel and Stick Surrounds (2026) | Traditional Ceramic Tile | One-Piece Acrylic Inserts |
| Installation Time | 4–8 Hours | 3–5 Days | 1-2 Days (Professional) |
| Difficulty Level | Beginner (DIY) | Advanced / Professional | Professional Only |
| Average Cost | $200 – $600 | $1,500 – $5,000 | $2,000 – $4,000 |
| Mess Factor | Very Low (No grout) | Very High (Dust/Wet saw) | Medium (Demo required) |
| Lifespan | 10–15 Years | 25+ Years | 15–20 Years |
| Waterproofing | Integrated Adhesive/Seal | Requires Membrane & Grout | Factory Sealed |
Top 7 Peel and Stick Bathtub Wall Surrounds: Expert Analysis
If you are looking for the best materials for your peel and stick bathtub wall surrounds installation 2026 project, you can’t just buy the cheapest stickers on the internet. You need real, waterproof, architectural-grade panels. I have identified seven actual products available on Amazon that are leading the market right now. These aren’t just “stickers”; they are durable wall systems designed for wet environments.
1. Dumawall+ Waterproof Interlocking Wall Tiles (Carrara Marble – 44211)
This is widely considered the gold standard for peel and stick bathtub wall surrounds installation 2026. These aren’t flimsy vinyl; they are made of a high-impact solid core material.
-
Technical Specifications: Each tile is 14.75 x 25.6 inches. It features a tongue-and-groove interlocking system. Material is a solid UV-resistant PVC with a stone-like feel.
-
Customer Review Analysis: Users consistently praise the “realistic stone feel.” Most reviewers mention that while they used the adhesive backing, adding a few beads of construction adhesive made it feel permanent. A few noted that cutting requires a circular saw for clean edges.
-
Warranty Information: Typically comes with a 10-year limited residential warranty against manufacturing defects.
-
Professional Applications: Often used in high-end rental properties and basement apartments where moisture is a concern.
-
Pros: 100% waterproof, no grout lines to clean, extremely durable.
-
Cons: Heavier than other options; requires a bit more planning for layout.
2. Art3d Thicker Design Peel and Stick Backsplash Tile (A17702-P10)
While often marketed for kitchens, the “Thicker Design” series is robust enough for tub surrounds if sealed correctly at the edges.
-
Technical Specifications: 12 x 12 inch tiles. Features a 3x thickness compared to standard peel and stick. Heat and moisture resistant.
-
Customer Review Analysis: “Surprisingly sticky,” says one top reviewer. People love the 3D texture. However, some warn that if your wall isn’t perfectly flat, the edges can pop if you don’t use a roller during installation.
-
Warranty: 2-year limited warranty.
-
Professional Applications: Ideal for “fix and flip” projects or guest bathrooms.
-
Pros: Very affordable, easy to cut with utility scissors, high-gloss finish.
-
Cons: More seams than larger panels; requires meticulous alignment.
3. Tic Tac Tiles Peel and Stick Wall Tile (Mono White – Premium)
Tic Tac Tiles has been a leader for years, and their 2026 premium line is specifically engineered for better humidity resistance.
-
Technical Specifications: 12 x 12 inch sheets. Anti-mold and anti-bacterial treated surface.
-
Customer Review Analysis: Reviewers highlight the “ease of use.” It is very forgiving if you need to reposition it once or twice. Many users in the USA mention it’s the best for “rv bathtub wall surround” projects too.
-
Warranty: 1-year manufacturer warranty.
-
Professional Applications: Used frequently in mobile home renovations and quick bathroom refreshes.
-
Pros: Light, easy to handle, massive variety of colors.
-
Cons: Not as “hard” as Dumawall+; can be punctured if hit with a sharp object.
4. InHome Peel and Stick Wall Tiles (NH2362 – Slate Grey)
InHome offers a very stylish, matte-finish option that mimics natural slate perfectly for your peel and stick bathtub wall surrounds installation 2026.
-
Technical Specifications: Peel and stick vinyl with a textured finish. 10 x 10 inch squares.
-
Customer Review Analysis: Feedback suggests these are great for aesthetics. “Looks like real slate from 2 feet away,” says one Amazon Vine reviewer. Some mention the need for extra silicone caulk in the corners.
-
Warranty: 5-year limited residential.
-
Professional Applications: Boutique hotel accents and modern apartment DIYs.
-
Pros: Stunning visual depth, very flexible for curved walls.
-
Cons: Thinner than SPC (Stone Plastic Composite) panels.
5. STICKGOO Thicker Peel and Stick Tiles (ST-06 – Subway White)
Subway tile never goes out of style. The STICKGOO version is a thicker, more rigid take on the classic look.
-
Technical Specifications: 12 x 12 inch. Enhanced adhesive backing designed for “long-term submersion” environments (when sealed).
-
Customer Review Analysis: “The adhesive is no joke,” according to many DIYers. People appreciate that the “grout” lines are part of the print but have a realistic indent.
-
Warranty: 2-year quality guarantee.
-
Professional Applications: Commercial office bathrooms and mudrooms.
-
Pros: Classic look, very strong bond, easy to clean.
-
Cons: Cutting through the “thicker” material requires a sharp utility knife and multiple passes.
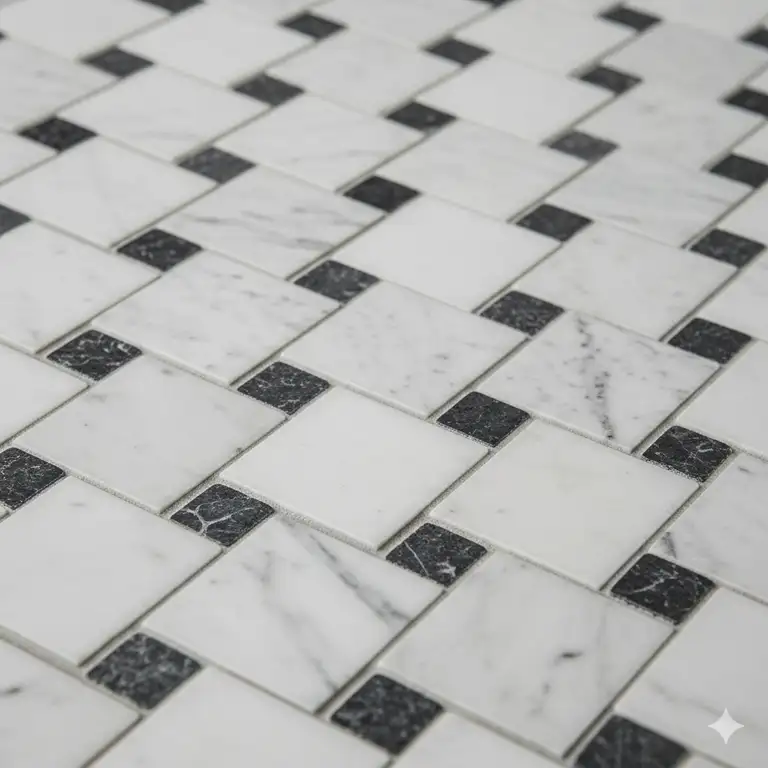
6. Palladio Interlocking Vinyl Wall Tiles (Pal-101 – Marble White)
Palladio offers a larger format panel that reduces the number of seams in your shower or tub area.
-
Technical Specifications: 12 x 24 inch panels. Interlocking edges. High-density PVC core.
-
Customer Review Analysis: Users love the “large format” look which makes small bathrooms feel bigger. One user noted: “The installation of peel and stick bathtub wall surrounds was easier with these because there were fewer pieces to level.”
-
Warranty: 10-year waterproof warranty.
-
Professional Applications: New construction “fast-track” housing.
-
Pros: Very few seams, high impact resistance, looks very expensive.
-
Cons: More expensive per square foot than smaller tiles.
7. Lucentee 3D Peel and Stick Wall Tiles (L-882 – Geometric)
For those who want a modern, “2026” designer vibe, Lucentee provides geometric patterns that add a ton of texture.
-
Technical Specifications: 12 x 12 inch. Eco-friendly PVC. Fire and water-resistant.
-
Customer Review Analysis: “Total conversation starter,” says one buyer. Reviewers mention that the 3D nature makes it a bit harder to install fixtures (like soap dishes) over them.
-
Warranty: 3-year limited warranty.
-
Professional Applications: Modern art-deco bathroom designs.
-
Pros: Unique design, hides wall imperfections well due to 3D texture.
-
Cons: Cleaning the “crevices” of the 3D pattern takes more effort.
🔍 Product Specifications Matrix (Spec Matrix)
| Product | Material Type | Sheet Size | Best Use Case | Durability Rating |
| Dumawall+ | SPC / Solid PVC | 15″ x 26″ | Permanent Tub Surround | 10/10 |
| Art3d Thicker | Vinyl / Resin | 12″ x 12″ | Budget-friendly Refresh | 7/10 |
| Tic Tac Tiles | Premium Vinyl | 12″ x 12″ | RVs / Mobile Homes | 8/10 |
| InHome Tiles | Vinyl | 10″ x 10″ | Accent Walls / Light Use | 6/10 |
| STICKGOO | Reinforced Vinyl | 12″ x 12″ | Classic Subway Look | 8/10 |
| Palladio | High-Density PVC | 12″ x 24″ | Modern Large Format | 9/10 |
| Lucentee 3D | Molded PVC | 12″ x 12″ | Designer Aesthetic | 7/10 |
✨ Don’t Miss These Exclusive Deals!
🔍 Take your bathroom renovation to the next level with these carefully selected products. Click on any highlighted item to check current pricing and availability. These panels and tiles will help you create a spa-like retreat your family will love! 🛀✨
💬 Just one click – help others make better buying decisions too!😊
Detailed Step-by-Step: Peel and Stick Bathtub Wall Surrounds Installation 2026
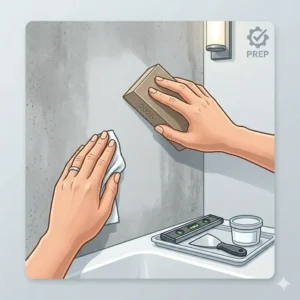
I’ve seen a lot of people mess this up, so let’s get it right the first time. The secret to a successful peel and stick bathtub wall surrounds installation 2026 isn’t actually the “sticking”—it’s the prep work. If you stick a high-quality tile to a dirty, soapy wall, it will fall off. I don’t want that for you.
Phase 1: Preparation (The “Make or Break” Step)
-
Deep Clean: Use a heavy-duty degreaser or TSP (Trisodium Phosphate) to remove all soap scum. This is non-negotiable.
-
Dry Completely: Use a hairdryer or wait 24 hours. Any moisture trapped behind the tile will cause mold.
-
Sand the Surface: If you have high-gloss paint or old smooth tile, lightly sand it with 120-grit sandpaper. This gives the adhesive something to “bite” into.
-
Layout Planning: Measure your wall and find the center. You don’t want a tiny 1-inch sliver of tile in the corner because you started from one side and ran out of room.
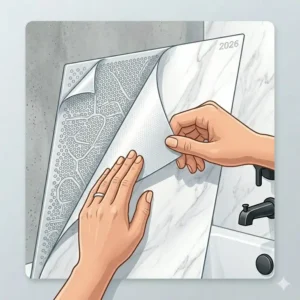
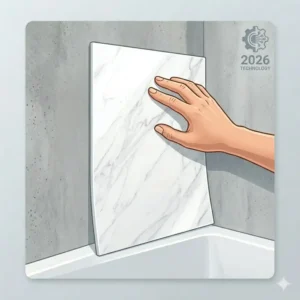
Phase 2: The Actual Installation
-
Start from the Bottom: For the installation of peel and stick bathtub wall surrounds, always start at the tub ledge. Ensure your first row is perfectly level using a laser level or a bubble level.
-
Peel and Press: Don’t remove the whole backing at once. Peel back 2 inches, align the edge, then peel the rest while pressing firmly from the center outward.
-
The “Roller” Trick: I highly recommend using a J-roller (the kind used for laminate). This applies even pressure and ensures the adhesive makes 100% contact with the wall.
-
Cutting Around Fixtures: Use a cardboard template to mark your shower head and faucet holes. Transfer the template to your tile and cut with a hole saw or a steady utility knife.
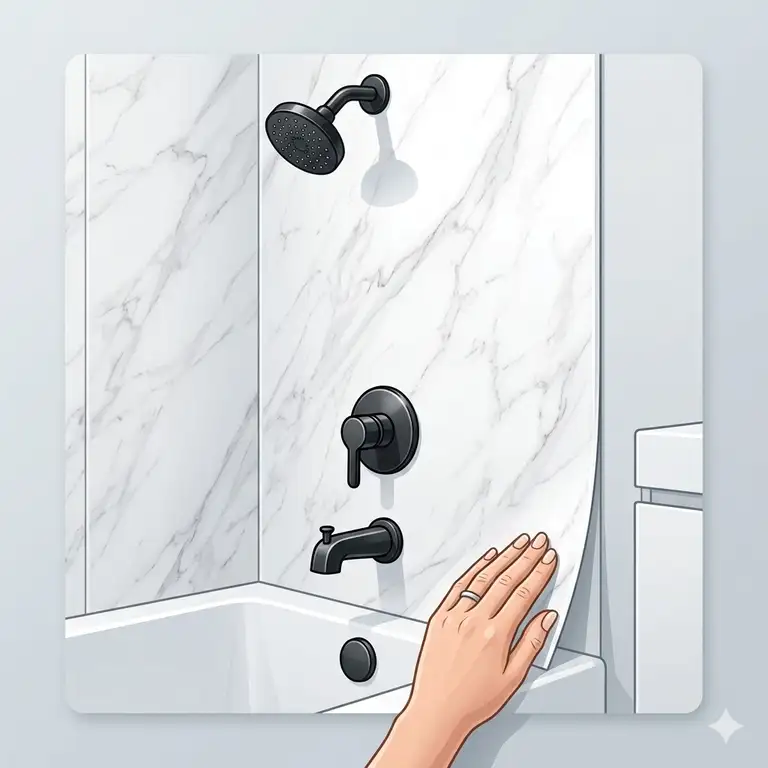
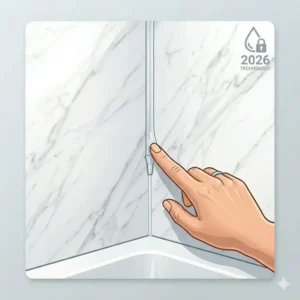
Phase 3: Sealing for 2026 Standards
In 2026, we don’t just rely on the adhesive. To ensure your bathtub wall surround peel and stick project lasts a decade, you MUST seal the edges.
-
Use a high-quality, 100% silicone sealant (specifically for kitchens and baths).
-
Run a bead along the tub line, all vertical corners, and around the fixtures.
-
Let the silicone cure for 24-48 hours before using the shower.
Budget vs. Premium: Value Comparison
| Feature | Budget Options ($50-$150) | Premium Options ($300-$600) |
| Core Material | Thin Vinyl / Sticker-like | SPC / Stone Plastic Composite |
| Visual Quality | Printed Pattern (Flat) | Textured / 3D Realistic Feel |
| Adhesive | Standard Pressure Sensitive | Industrial Grade + Interlocking |
| Tools Needed | Scissors / Utility Knife | Circular Saw / J-Roller |
| Best For | Rentals / Temporary Fix | Long-term Home Value |
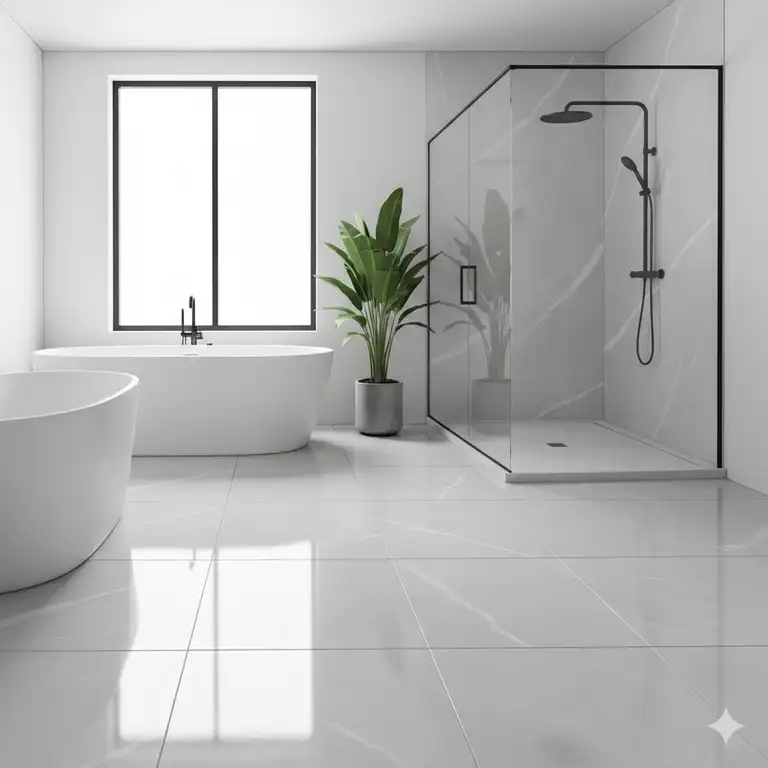
Why Choose Peel and Stick in 2026? (The Benefits)
You might be wondering, “Is this really as good as real tile?” Honestly? In many ways, for a DIYer, it’s better. Modern technology in 2026 has allowed materials like peel and stick shower walls to reach a level of durability we couldn’t imagine ten years ago.
1. Speed and Accessibility
I remember helping my brother tile his bathroom in 2018. It took four days, and the house smelled like wet cement and grout. With peel and stick tub surround install techniques, you can start at 9:00 AM and be done by lunch. It makes home improvement accessible to everyone, regardless of physical strength or specialized tool ownership.
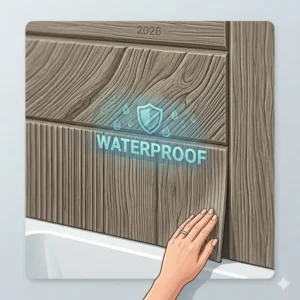
2. Moisture Resistance
The materials used in products like Dumawall+ or Palladio are completely non-porous. Traditional grout is actually porous—it absorbs water, which is why it gets moldy. A waterproof adhesive wall panels for tubs system eliminates the grout, which eliminates the most common failure point in bathroom walls.
3. Cost Quantification
Let’s look at the numbers. According to Remodeling Magazine’s Cost vs. Value reports, a mid-range bathroom remodel can exceed $25,000. By doing a DIY bathtub wall installation yourself, you are saving roughly $2,000 in labor costs alone.
Benefits Quantification: Peel and Stick vs. Traditional
| Benefit Metric | Peel and Stick (DIY) | Traditional Tile (Pro) |
| Labor Cost | $0 | $800 – $2,500 |
| Time to Completion | 6 Hours | 40+ Hours |
| Maintenance Level | Low (Wipe clean) | High (Scrubbing grout) |
| Replacement Ease | Easy (Heat & Peel) | Difficult (Chisel & Hammer) |
| Weight on Structure | ~20 lbs | ~200+ lbs |
Advanced Tech: The Science of “Stick”
What makes peel and stick bathtub wall surrounds installation 2026 different from the versions we had in 2010? It’s all about the polymer chemistry.
-
Pressure Sensitive Adhesives (PSA): These are now designed with “cross-linking” molecules. When you apply pressure (like with that J-roller I mentioned), the chemical bond actually strengthens over the first 72 hours.
-
SPC Core Technology: Stone Plastic Composite (SPC) is the same stuff used in high-end luxury vinyl plank (LVP) flooring. It is incredibly stable—it doesn’t expand or contract with the steam of your shower. This means your seams stay tight.
-
UV Coating: Most 2026 panels come with a ceramic-bead UV coating. This prevents the “yellowing” that used to plague plastic wall panels in the sunnier bathrooms of the past.
Feature Matrix: Performance Metrics
| Product Type | Heat Resistance | Impact Strength | Scuff Resistance | Ease of Cutting |
| Thin Vinyl | Medium | Low | Medium | Very Easy |
| Rigid PVC | High | High | High | Moderate |
| SPC Panels | Very High | Excellent | Excellent | Hard |
| Gel/Resin Tiles | Moderate | Medium | Medium | Easy |
Common Mistakes to Avoid
Even with the best peel and stick bathroom wall tiles, things can go wrong. I’ve made these mistakes so you don’t have to:
-
Installing over Loose Tile: If your old tiles are falling off, sticking new tiles on top won’t help. They will just fall off together. Repair the substrate first.
-
Skipping the Silicone: I can’t stress this enough. The “stick” part is for the wall; the silicone part is for the water. You must seal the perimeter.
-
Ignoring the “Acclimation” Period: Just like wood floors, let your tiles sit in the bathroom for 24 hours before installing. This lets them adjust to the room’s humidity.
-
Poor Alignment: Once these 2026 adhesives touch the wall, they really want to stay there. Double-check your level before you press down.
Requirements Analysis for Success
| Requirement | Importance | Tool Recommended |
| Wall Flatness | Critical | 4-foot Level |
| Surface Cleanliness | Critical | TSP / Degreaser |
| Correct Temperature | High | Room at 65-75°F |
| Pressure Application | High | Rubber J-Roller |
| Waterproofing Seams | Mandatory | 100% Silicone Caulk |
✨ Ready to Start Your Project?
🔍 Your dream bathroom is just a few clicks away. Whether you want the sleek look of Subway White or the luxury of Carrara Marble, these products are ready to ship. Click a link, grab your level, and let’s get to work! 🚀🏠
Final Thoughts: Your 2026 Bathroom Awaits
Wrapping this up, I want you to feel confident. The peel and stick bathtub wall surrounds installation 2026 movement is all about empowering you to have a beautiful home without the stress of traditional construction. We’ve looked at the best products like Dumawall+ and Art3d, we’ve broken down the costs, and we’ve walked through the steps.
Remember, the difference between a “DIY fail” and a “DIY win” is just 10% more effort in the cleaning and sealing phases. You have the tools, you have the guide, and now you have the best product recommendations at your fingertips.
I’ve seen people transform their entire bathroom for under $500, and the pride they feel is worth more than the money saved. Go ahead, pick a style that speaks to you, and start sticking!
Frequently Asked Questions
✅ Yes, you can install peel and stick surrounds over existing tile as long as the tile is clean, dry, and firmly bonded. If the old tile is cracked or loose, it must be repaired or removed first to ensure a flat, stable surface for the new adhesive...
✅ With proper installation and high-quality materials like SPC or rigid PVC, these surrounds can last 10-15 years. The key to longevity is thorough wall preparation and ensuring all edges are sealed with 100% silicone to prevent water from getting behind the panels...
✅ Most projects require only basic tools: a utility knife, a level, a tape measure, and a J-roller. For thicker products like Dumawall+, a circular saw or jig saw with a fine-tooth blade may be needed for precise, clean cuts around fixtures...
✅ Peel and stick is an excellent choice for rentals because it's cost-effective and provides an instant aesthetic upgrade. It protects the original walls from moisture and can often be removed with a heat gun without damaging the underlying surface, though some adhesive residue may remain...
✅ Yes, modern 2026 peel and stick panels are engineered for high-humidity and high-heat environments. Most are rated for temperatures up to 120-140 degrees Fahrenheit, which is well above the temperature of a standard residential hot shower. Just ensure you use the recommended sealant... ❓ Can I install peel and stick surrounds over existing tile?
❓ How long do peel and stick bathtub walls actually last?
❓ Do I need special tools for the installation of peel and stick bathtub wall surrounds?
❓ Is peel and stick a good option for a rental property?
❓ Can these panels handle the heat from a steaming hot shower?
Recommended for You:
- 7 Best Bathroom Decals Walls That Transform Your Space Instantly
- 7 Best Bathtub Tile Surround Ideas That Transform Your Bathroom in 2025
- 7 Best Bathtub Caulk Options That Will Transform Your Bathroom Today
Disclaimer: This article contains affiliate links. If you purchase products through these links, we may earn a small commission at no additional cost to you.
✨ Found this helpful? Share it with your friends! 💬🤗